Wednesday, August 29, 2012

Zucchini Muffins


First off, the focus is off on a lot of these pictures. I'm thinking I might need glasses. Second, these muffins are awesome. I got the recipe from Simply Recipes, a great source for good recipes.


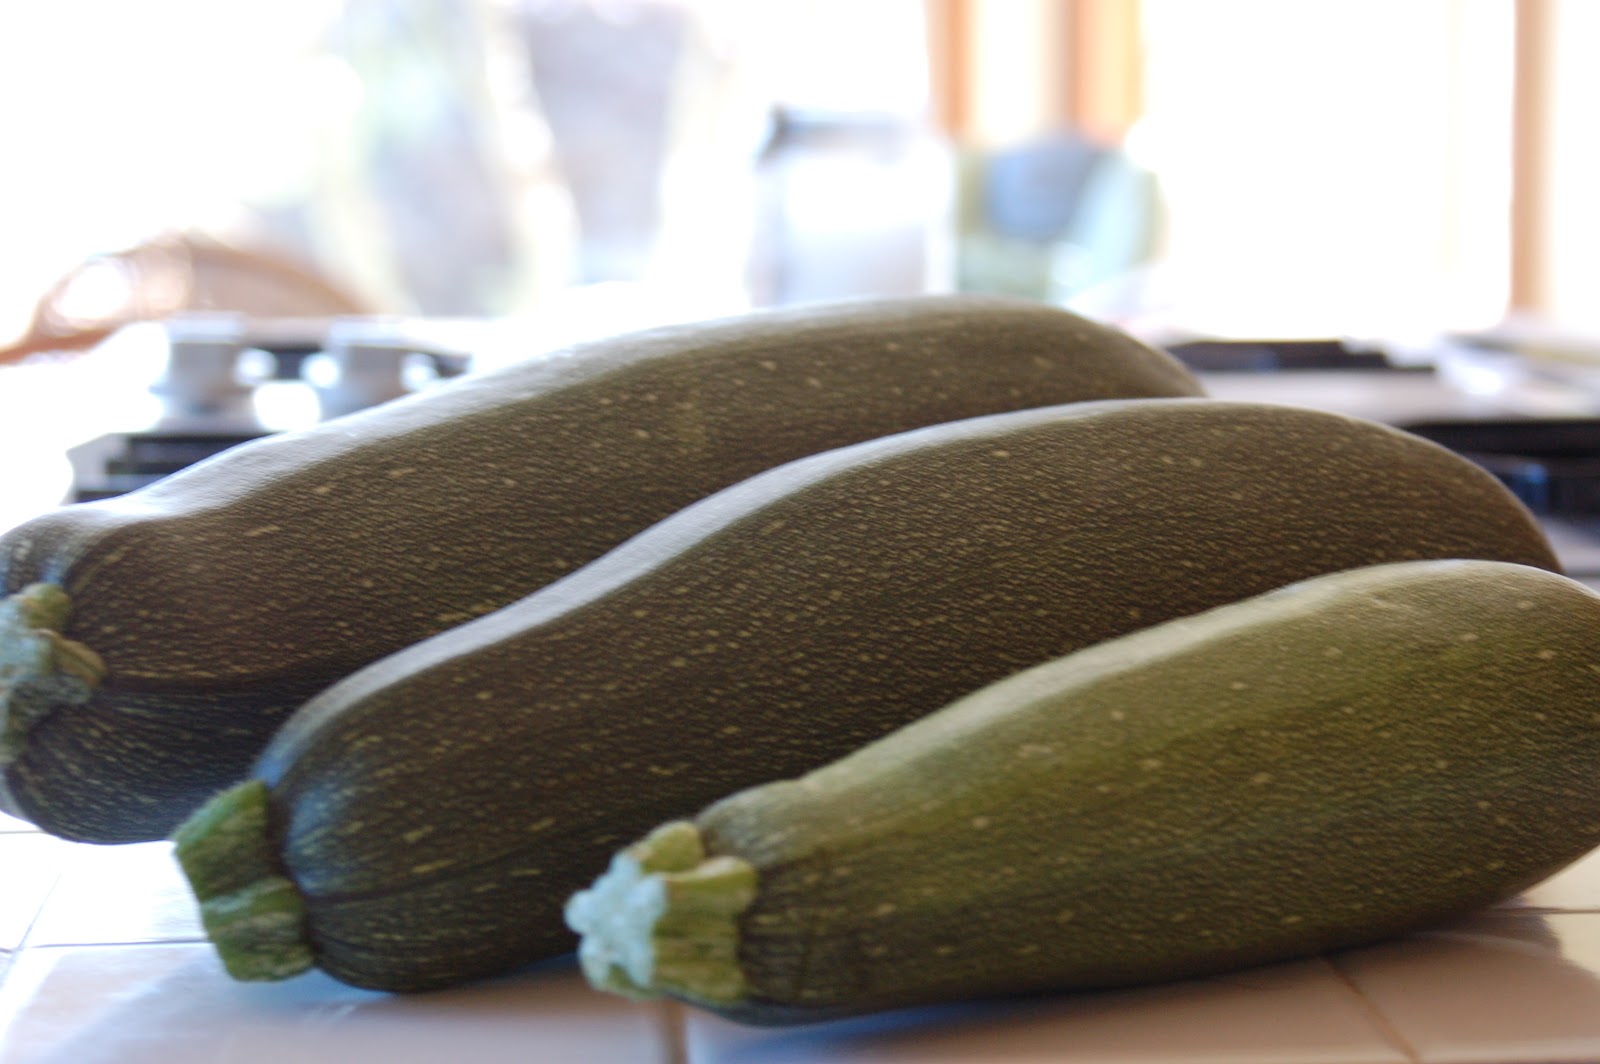
Our zucchini plant seemed to take all Summer to produce. Now it's producing like crazy!

 
Start by grating the zucchini. If you are using an especially giant one like I did, cut out the center seedy and spongy parts and discard.
 
 
Put the grated zucchini into a strainer and press out the excess liquid.


In a large bowl mix together the sugar, eggs and vanilla.


Stir in the grated zucchini and then the melted butter.
 
 
Instead of putting the dry ingredients into a separate bowl, I simply sifted them on top of the wet ingredients and stirred until combined. I was making the muffins for a bunch of kiddos so I chose not to add in nuts or raisins.
 
The directions say to completely fill the muffin cups. I did that and managed to make only 12 muffins. Bake 350 degrees for 25 minutes.
 

Here they are. They puffed up beautifully.

 
They were also dense. Do you see how the rack bows in the middle? Yowza. I expected them to be so dense that they would sit like rocks in the tummy. They didn't. Very much like zucchini bread, these muffins were fabulous. I'll definitely make them again.
 
Zucchini Muffins
 
Ingredients:
 
3 c. grated fresh zucchini
2/3 c melted unsalted butter
1 1/3 c. sugar
2 eggs, beaten
2 t. vanilla
2 t. baking soda
pinch of salt
3 c. flour
2 t. cinnamon
1/2 t. nutmeg
1 c. walnuts (optional)
1 c. raisins or dried cranberries (optional)
 
Directions:
 
Preheat the oven to 350 degrees. In a large bowl combine the sugar, eggs, and vanilla. Stir in the grated zucchini and then the melted butter. In a separate bowl, mix together the flour, baking soda, nutmeg, and cinnamon. Stir these dry ingredients into the zucchini mixture. Stir in the walnuts, raisins or cranberries if using.
 
Coat each muffin cup in your muffin pan with a little butter or vegetable oil spray. Use a spoon to distribute the muffin dough equally among the cups, filling the cups up completely. Bake on the middle rack until muffins are golden brown, and the top of the muffins bounce bake when you press on them, about 25 to 30 minutes. Test with a long toothpick or a thin bamboo skewer to make sure the center of the muffins are done. Set on wire rack to cool for 4 minutes. Remove muffins from the tin and let cool another 20 minutes.


Monday, August 27, 2012

One Big Sandwich


I filled in this past week at my old job. It was a fun change of pace. The best part was the last day we got take out for lunch from this place. The sandwich totally lived up to its name. It was huge. It was dense. It was mighty tasty. Of course I ate the entire thing.

At night I was still so full I skipped dinner and then breakfast this morning. It was a gut bomb and totally worth it!

Friday, August 24, 2012

Washing Windows


When Jim and I got married I told him there were two things I absolutely did not do...cleaning ovens and washing windows. Somehow throughout the years I've started to do both. I've had some extremely comical moments and quite the learning curve.

 
Cleaning windows and mirrors without streaks has been something I have not been able to accomplish until my sister-in-law told me about foaming glass cleaner. Have you ever used it? The key to foaming cleaners is that it doesn't drip. Do you have a mirror that has gotten black spots on it? Like the backing is being eroded away? If so, that's probably your glass cleaner dripping down the mirror, underneath and literally eating away the backing. The great thing about foaming cleaners is no dripping!

I find myself a little shocked to say this but I don't really mind cleaning windows anymore. Ovens on the otherhand...ugh.

Sunday, August 19, 2012

My Sister


I've always looked up to my big sister. She taught me to walk. She taught me to try new foods even though they might look strange.
Today I love her for so many more reasons.

She makes me laugh.

She immediately takes my side of an argument.

I see traits in both my kiddos of her.

She loves my kiddos as if they were her own.

She is honest, sometimes brutally so.

She is unquestionably loyal.

She makes the best chocolate chip cookies. And taught me how.

She knows about all of my quirks but still loves me.

I couldn't ask for a better big sis. Love you!

Wednesday, August 15, 2012

Sneaky


I went to the bathroom and came back to this... Gabby had managed to get into a cupboard, found a zip lock bag of gingersnap cookies, opened the bag, dumped them on the floor...


Played with them, and...


Ate them. She was a happy girl. As soon as Nate saw he dove right in for the snack. I had two very upset kids when I scooped them up and threw them away!

Sunday, August 12, 2012

Kowabunga

Large Preview

Last week we went down to Southern California to visit my folks. It was a great week of eating, swimming and eating some more. I gained 4 pounds and the hubby 7...what a great week!

Large Preview

When we first got to my parents' place Nate did not want to go in the pool without someone holding him at all times. By the end of the week he was leaping off of the rocks pretending to be a super hero. I'm surprised his skin isn't still puckered and wrinkly from the amount of time he was in the pool!

Large Preview

My baby girl was not a fan of the outdoors. It was either too hot or too windy or too bright or a combination of the elements. She preferred the air conditioning. She also preferred the great meals and snacks her Poh Poh (grandmother) made her. Her she is happy after finishing her dinner. A full tummy makes for a very happy Gabry.


Friday, August 10, 2012

Perfect Corn


Growing up we never seemed to get simple corn cooked properly. It was often over-cooked and became chewy or under-cooked and raw tasting. The hubby's grandfather came from Kansas and had a sure-fire way to have perfect corn each and every time. Here's how to do it: Shuck the corn and chop off the tips if they are withered or mushy.


Get a pot of water boiling. The pot should be deep enough that the corn will be fully submerged. Put the corn in, cover with a lid and turn OFF the heat. That's right OFF.


Leave the corn in the covered pot for 5 minutes. Take the corn out and it's ready to be eaten. It will be perfectly cooked!

Tuesday, August 7, 2012

Fresh Blueberry Tart

I went blueberry picking with the kiddos and brought home 3 pounds of blueberries. I think that Nate and Gabby had at least that much in their bellies. They ate non-stop! I promised my father-in-law a blueberry dessert so dug out this Fresh Blueberry Tart recipe from my to do pile. It is probably the best blueberry dessert I have ever made. As my college-age nephew said this tart is "da bomb".


The ingredient list is simple: blueberries, flour, sugar, powdered sugar, butter, lemon, cornstarch and salt.

Start by putting the flour, powdered sugar and salt in a food processor. Pulse a few seconds to blend.


Add in the butter. Pulse until the butter incorporates into the flour and becomes a dough.

It should be a cohesive ball of dough like this. Not just crumbles.

Take the dough and push it into a tart tray.


Make sure to go all the way up the sides.


Take a fork and pierce all over the tart shell. This will keep the tart from bubbling while in the oven. Bake for 25 minutes or until golden.

While the tart shell is baking get started on your glaze. Put the granulated sugar, cornstarch and salt into a medium sized saucepan. Whisk to blend. You don't want cornstarch lumps or you will never get rid of them!
Add in the water and lemon juice. Whisk until smooth.


Add butter, lemon peel and 2 cups of blueberries to the pot. Take out any pent-up aggression and mash with a potato masher.

It doesn't have to be perfectly smooth. Cook mixture until it boils and thickens. It will turn a dark purple. Sadly, I forgot to take a picture (too excited). Fold in the remaining 4 cups of blueberries into the glaze.

Pour into the baked tart shell. Smooth and refrigerate until cold.


Slice and serve with whipped cream on top. For decoration, add some fresh, unglazed blueberries on top with some lemon zest strips.

Fresh Blueberry Tart
Ingredients:
Crust:
1 1/4 c. all-purpose flour
3 T. powdered sugar, packed
1/4 t. salt
10 T. (1 1/4 sticks) chilled unsalted
butter, cut into 1/2-inch cubes
Filling:
3/4 c. sugar
3 T. cornstarch
pinch of salt
2 T. cold water
2 T. fresh lemon juice
1 T. unsalted butter
1 t. grated lemon peel
6 c. fresh blueberries (about 7 1/2-pint containers)
Lightly sweetened whipped cream
Directions:
For Crust: Preheat oven to 350 degrees. Blend flour, sugar, and salt in processor 5 seconds. Add butter; using on/off turns, blend until clumps form. Gather dough into ball. Press dough over bottom and up sides of 10-inch-diameter tart pan with removable bottom; pierce all over with fork. Bake crust until golden, about 25 minutes. Cool completely.
For Filling: Whisk sugar, cornstarch, and salt in medium saucepan to blend. Gradually add 2 tablespoons cold water and lemon juice, whisking until smooth. Add butter and lemon peel. Add 2 cups berries and mash coarsely with potato masher. Cook over medium heat until mixture thickens and boils, stirring occasionally. Remove from heat. Fold in remaining 4 cups berries. Transfer filling to prepared crust. Garnish with fresh blueberries and thin strips of lemon zest. Refrigerate until cold, at least 1 hour.
Remove tart from pan. Cut into wedges; serve with whipped cream.
Notes: Can be prepared 1 day ahead. Cover loosely with foil and keep refrigerated.

Thursday, August 2, 2012

Tasty Tortillas

Quesadillas are a staple in our household. I think that they are in just about every house with a toddler. A major pitfall of quesadillas is that most of the tortillas you find in stores have ingredients that you can't identify let alone pronounce. These tortillas, however, are fabulous! They are from Costco and you definitely know the ingredients: wheat flour, water, canola oil, salt and sugar.

They are "raw" tortillas so you have to cook them. It is so simple, heat a skillet and throw a raw tortillas on top.

When it starts to dimple, flip it over and cook the other side.


Pretty slick, eh? Not only do they taste better than most store bought tortillas, they keep well too! The pack from Costco have two 22-count packages. We simply keep one in the refrigerator and one in the freezer. They thaw out great.

Seriously, these tortillas are awesome. We use them for breakfast burritos, mu shu pork, and eat them plain. Check them out!